Custom fonts can be a suprisingly difficult topic to tackle, especially on the web. We’re going to try to make it easier by giving you the info you need to start working with them properly on the web!
What Are Web Fonts?
The Difference Between “Web Safe Fonts” and “Web Fonts”
Whether it’s a tutorial, news article, or even a blog post like this one, the bulk of content on the web is delivered through text. Because of this, fonts play a crucial role in web design by ensuring that your content is readable while still matching the feel of your site design and its content. Web safe fonts are installed out of the box on most computers, allowing websites to display your text the same way across all machines. Some web safe fonts include Arial, Times New Roman, Verdana, Segoe UI, Impact, and… well… that’s mostly all. Due to the limited selection, using only web safe fonts in web design poses a unique design challenge, as they don’t often match the look and feel that most brands want to put forward when designing a website. Web fonts provide a solution to this problem.
Instead of needing to be pre-installed on a user’s computer, web fonts are downloaded along with a page when rendered, opening a whole world of options for design. By installing the font when the page is loaded, web designers can use virtually any font they can find or even fonts they create themselves and still have content appear the same way across all devices. In this post, we’ll walk you through how to use web fonts on your sites to deliver your content in style, where to find the perfect font, and what pitfalls to watch for when using them.
Picture Perfect
How to Pick a Font and Where to Find Them
With the world of fonts at your fingertips, it’s easy to feel lost when deciding which to use for your site, and picking the right one is more challenging than you’d think! Not only should you choose one font that matches your site’s tone, but most projects use at least two fonts, one for important information, which should be eye-catching and definitive, and one that pairs with it for your content. These are called font pairings, which ideally contrast each other perfectly to have titles stand out from the rest of your content while maintaining a unified tone. Luckily there are tools to help you choose free font pairings for your site.
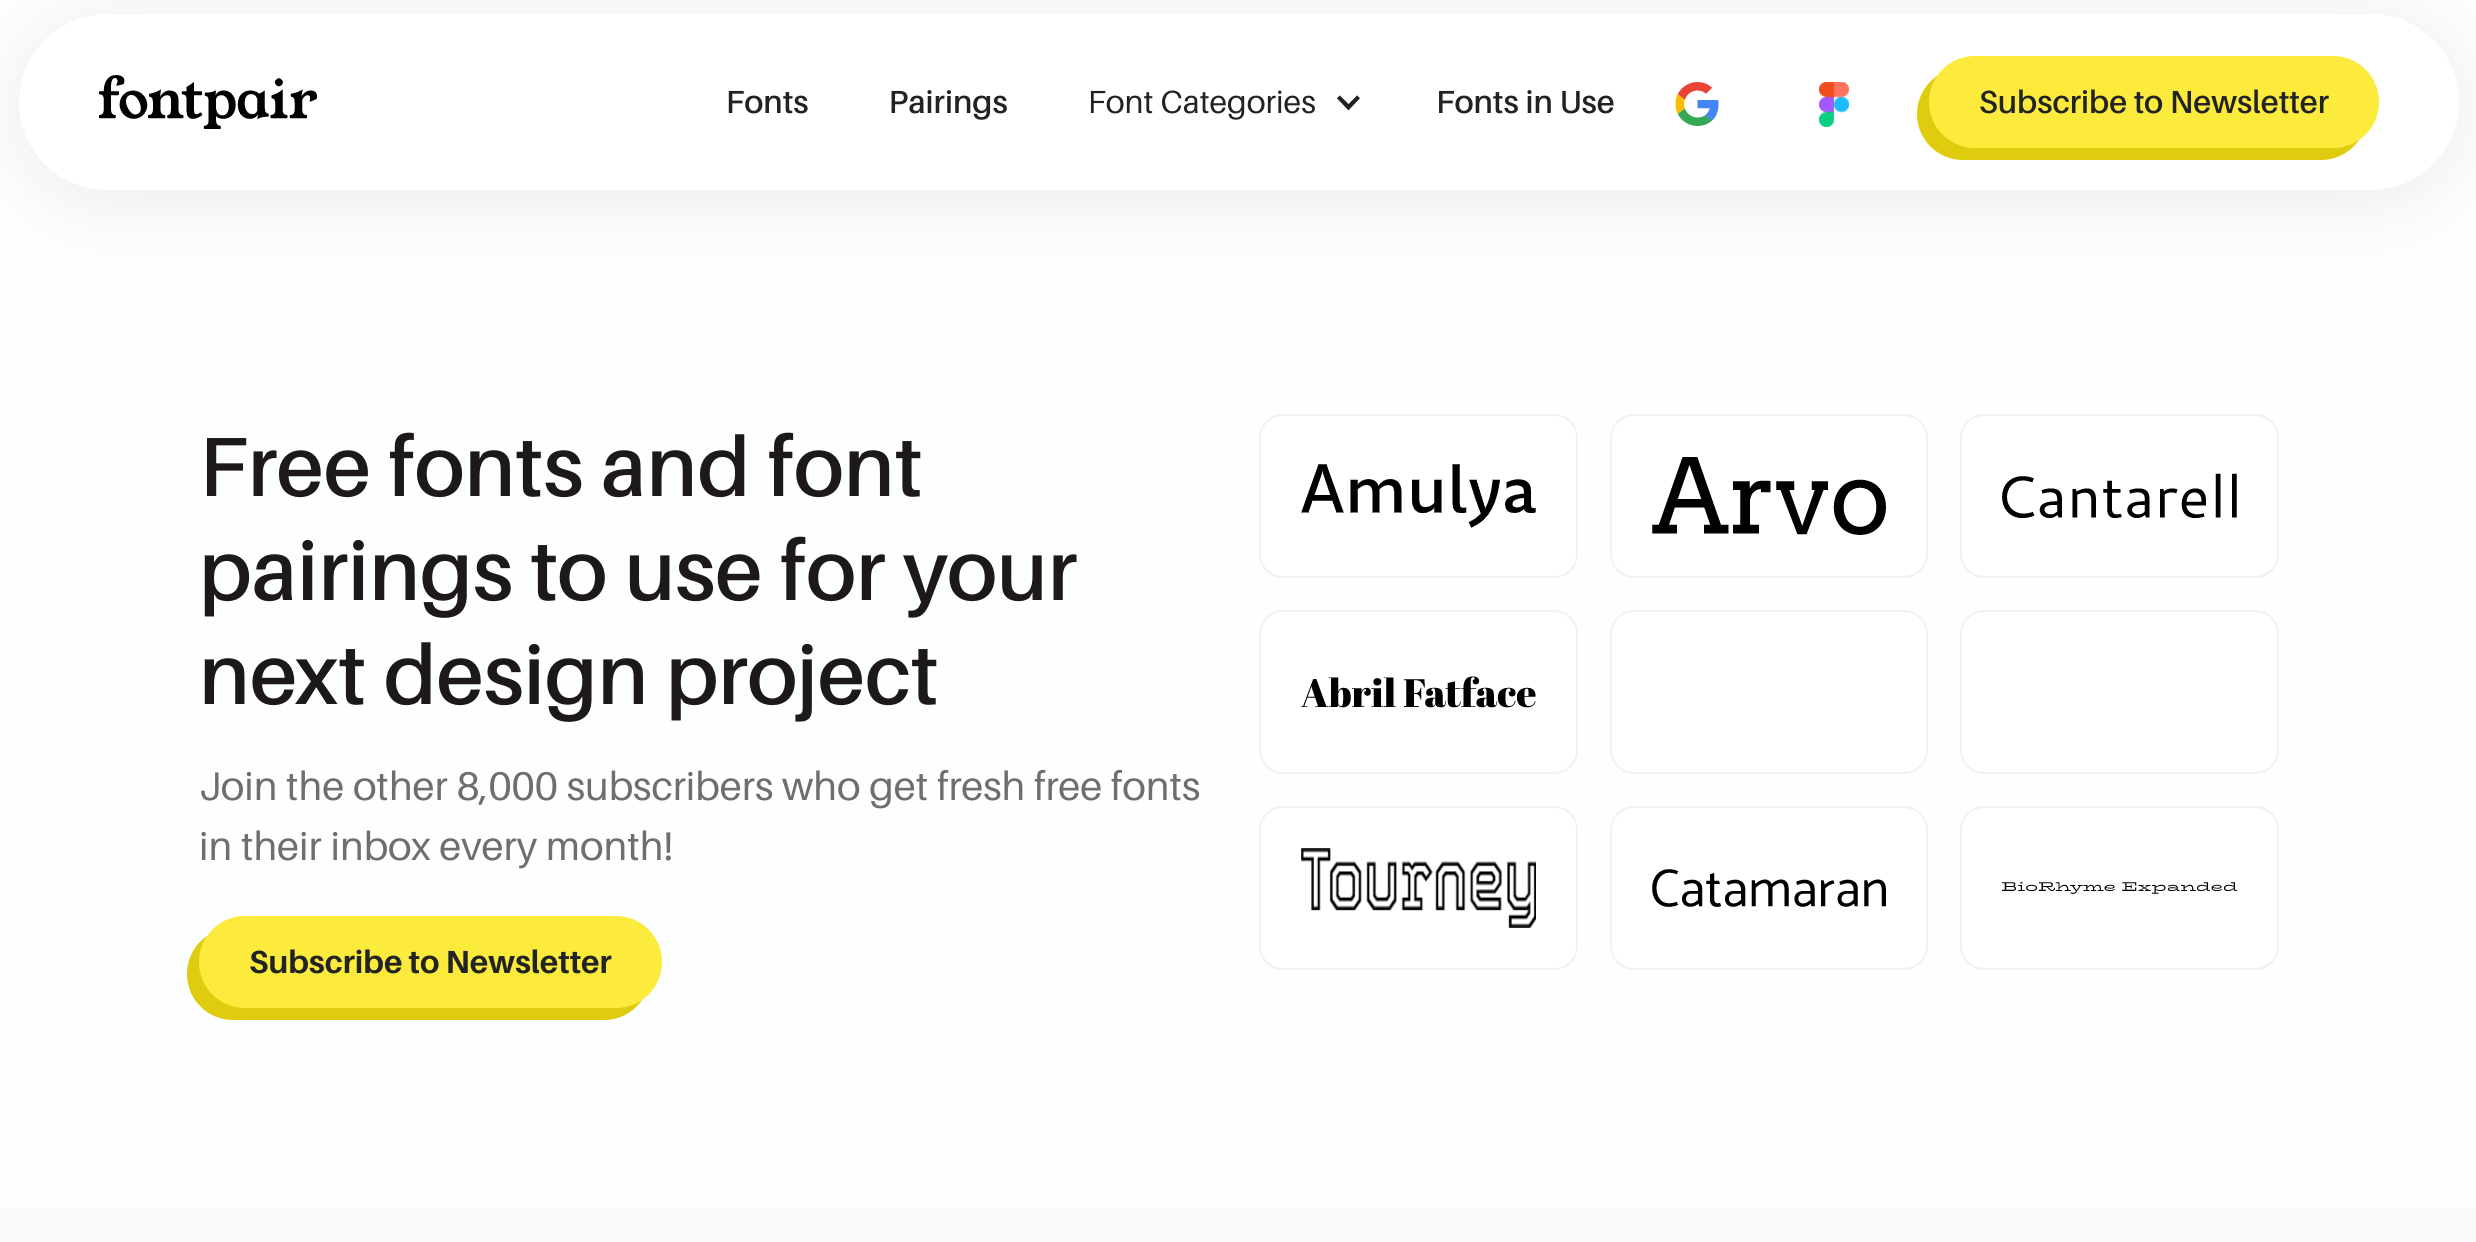 Fontpair is a great all-in-one tool that provides you with options for font pairings and downloads to each of the fonts provided. Seeing the plethora of font pairings offered side by side will allow you to choose the best font pairing to suit the tone of your content.
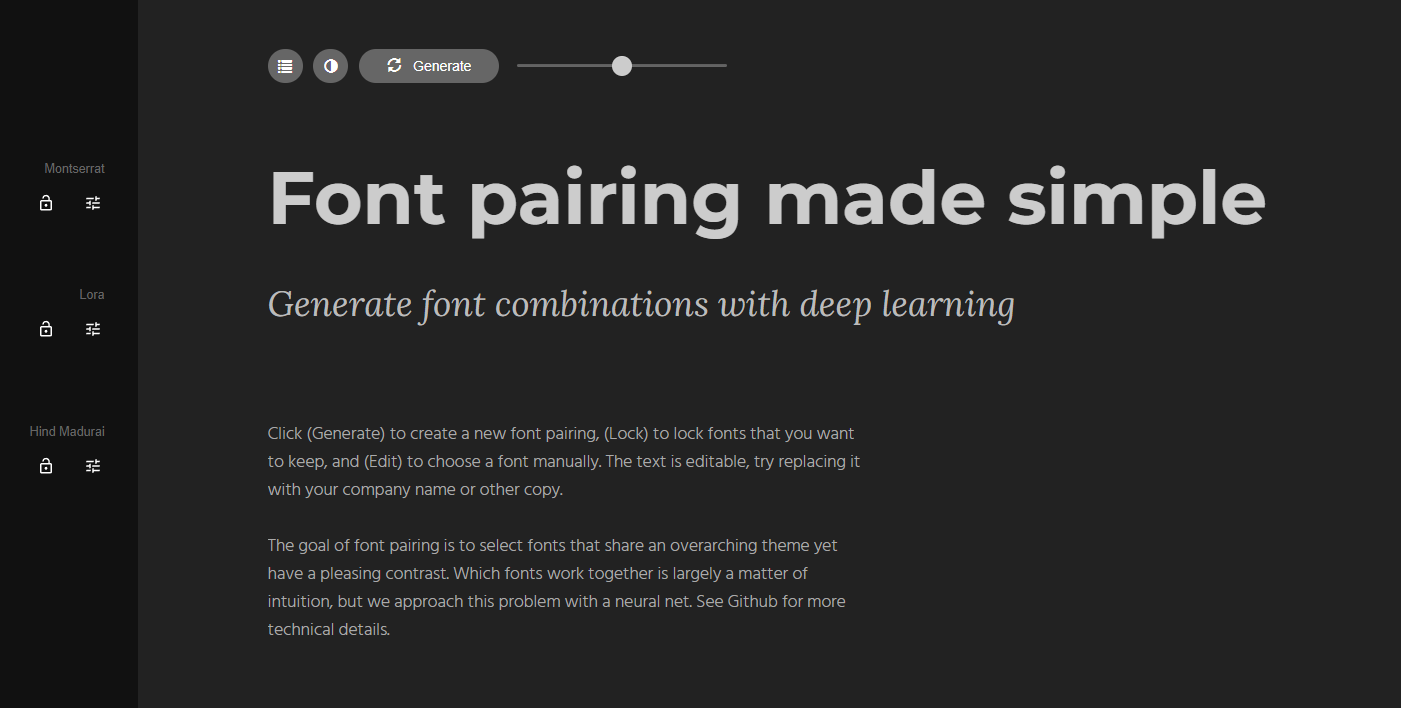 Fontjoy is a web app that uses machine learning to pair together fonts that have the optimal amount of contrast without being too dissimilar. When you find one font you like, Fontjoy even lets you look at a list of all optimal fonts to pair with the chosen font!
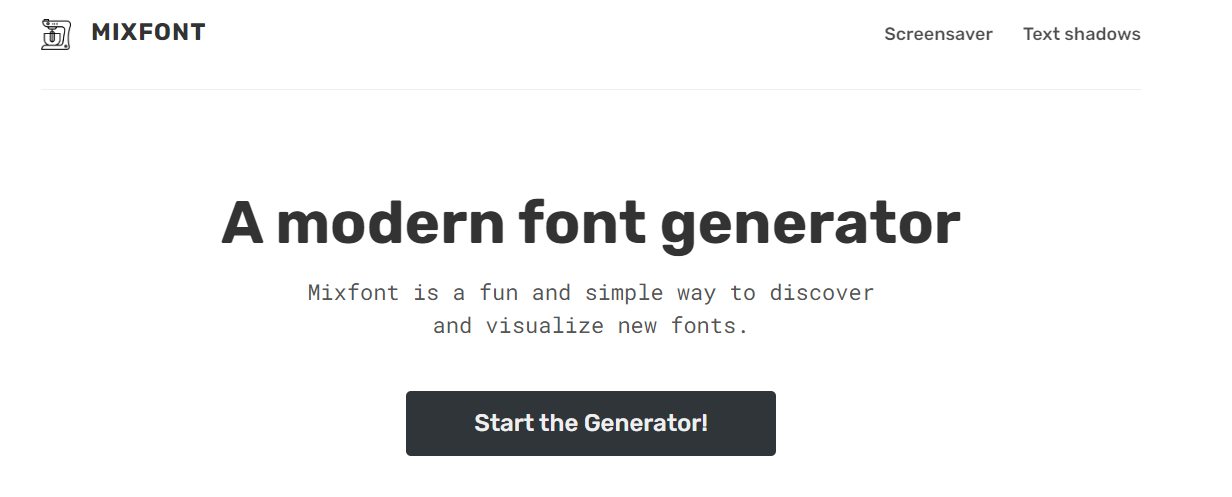 Like FontJoy, Mixfont is a font pairing generator that provides users with the pairings themselves and examples of how the fonts will look on a web page or within an application. Loads of provided examples of each pairing that the site generates will help you visualize ways to use the fonts to their fullest potential within your projects.
Make Your Own!
While font pairing generators and curated lists are a great way to find an ideal type for your project, sometimes they don’t cut it, and you’ll need to create your own pairing to match your vision perfectly. While you may not be able to find the perfect pairing just by browsing through the many fonts at your disposal, there are many rules of thumb you can follow to help you pick fonts that suit your needs and look good doing it. This handy infographic created by graphic designer Lindsay Marsh summarizes some of these rules to get you started.
How to Use Web Fonts
Adding your font pairing to your website
Now that we’ve successfully navigated the vast world of fonts on the web to find an excellent font pairing to use in our project, the new question is, “how can we use these fonts on our site?” We can accomplish this in a few ways:
1. Using a CDN to Import Web Fonts from Font Providers
While there are many paid font providers like Adobe Fonts, Google Fonts provides almost 1,500 fonts free of charge and provides you with the code needed to import the fonts directly within your CSS without downloading or hosting any extra files. Here’s how we can use the Google Fonts CDN to add a web font to our project.
1. Find the font you’d like to use on Google Fonts
For this example, we’ll use Righteous a fantastic heavy font with some style that makes it perfect for titles on our web page.
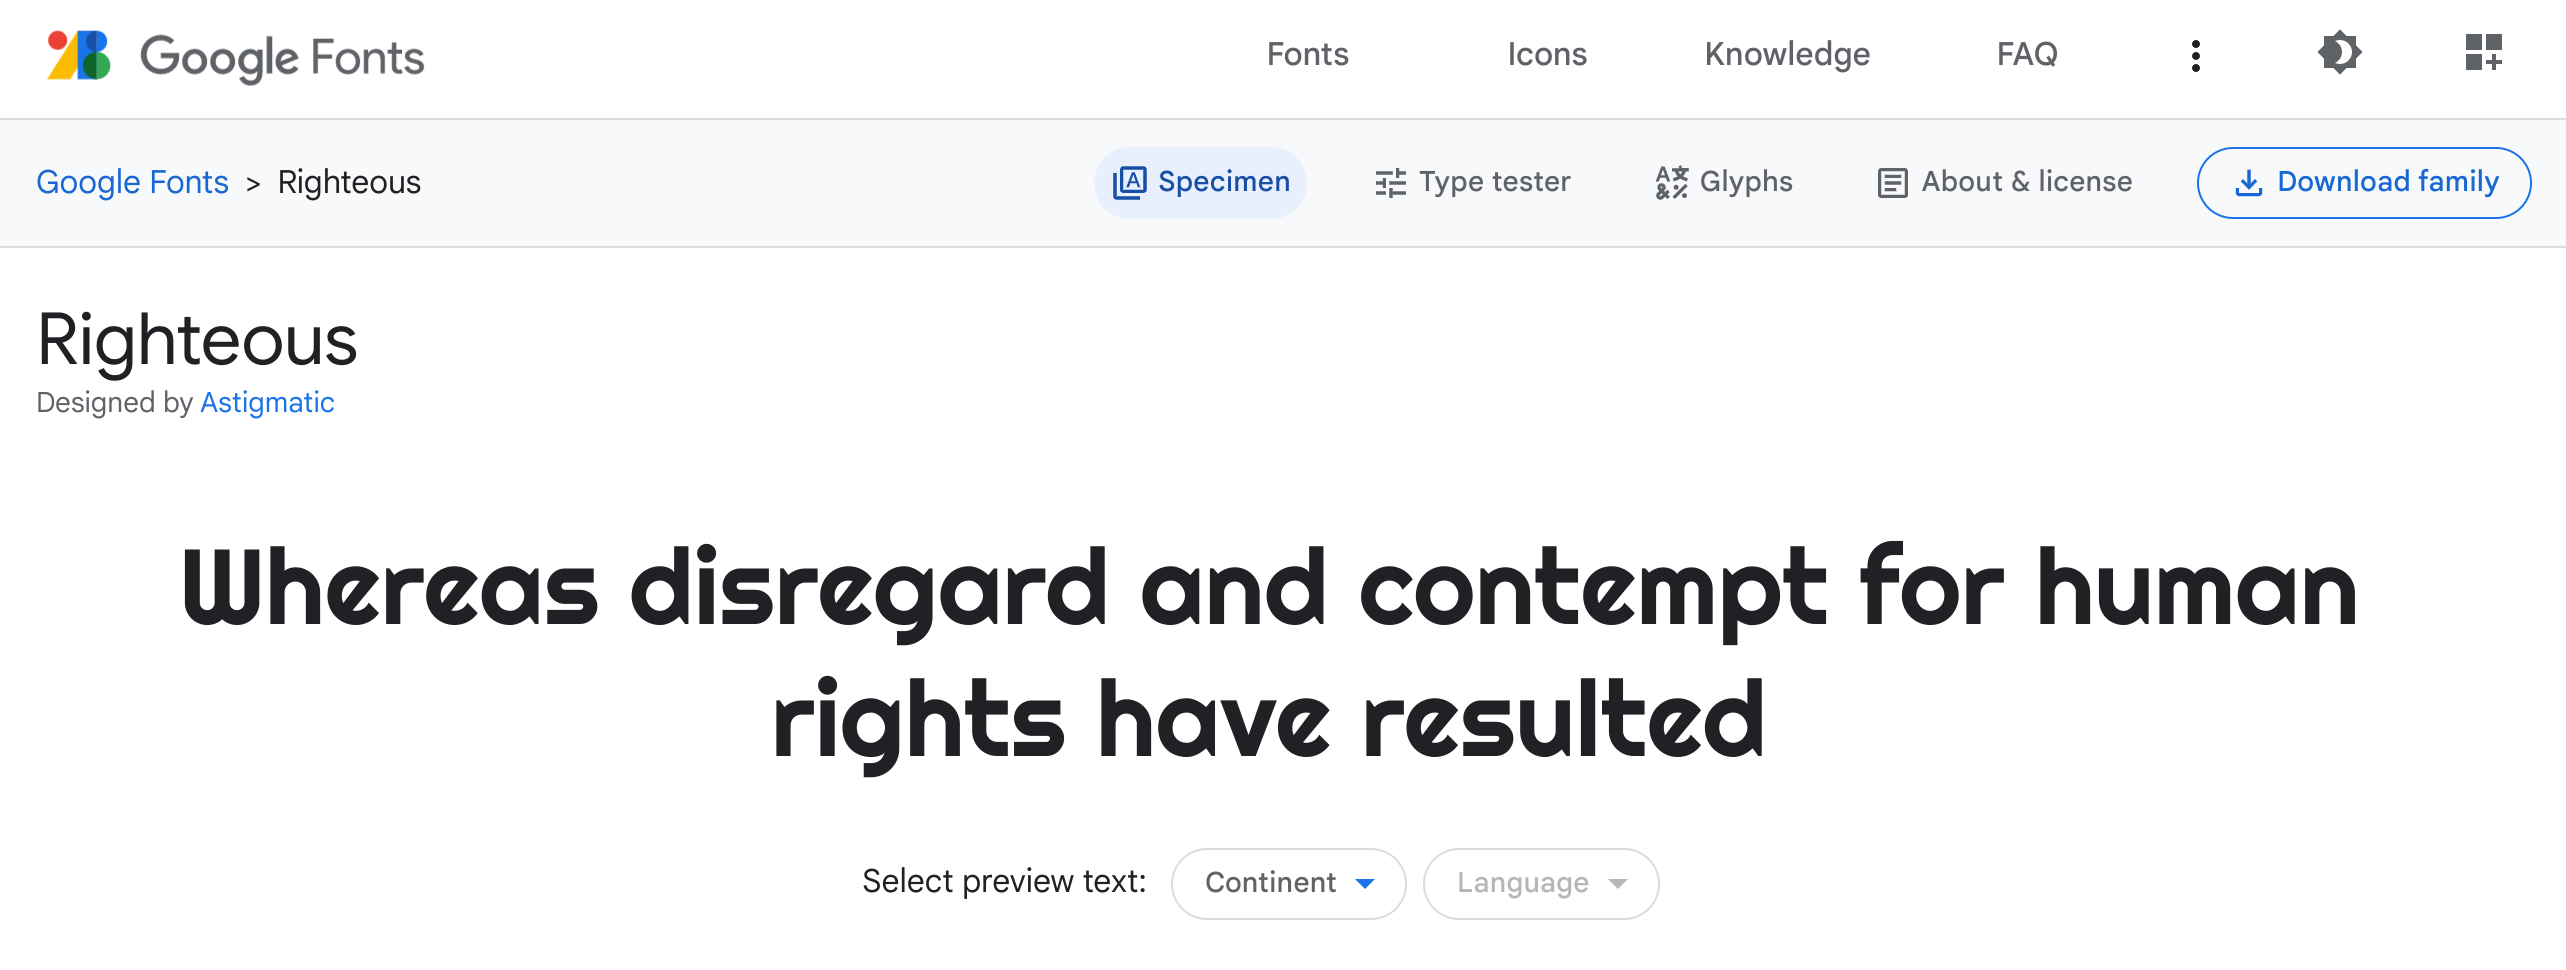
2. Once you’ve found your font, select the weight you want to add to your site
You can still change font weight in your CSS rules, but the weight selected here will define the default for your imported text when it is not specified. Only the “Regular 400” weight is available in this case, so we’ll select this for our site.
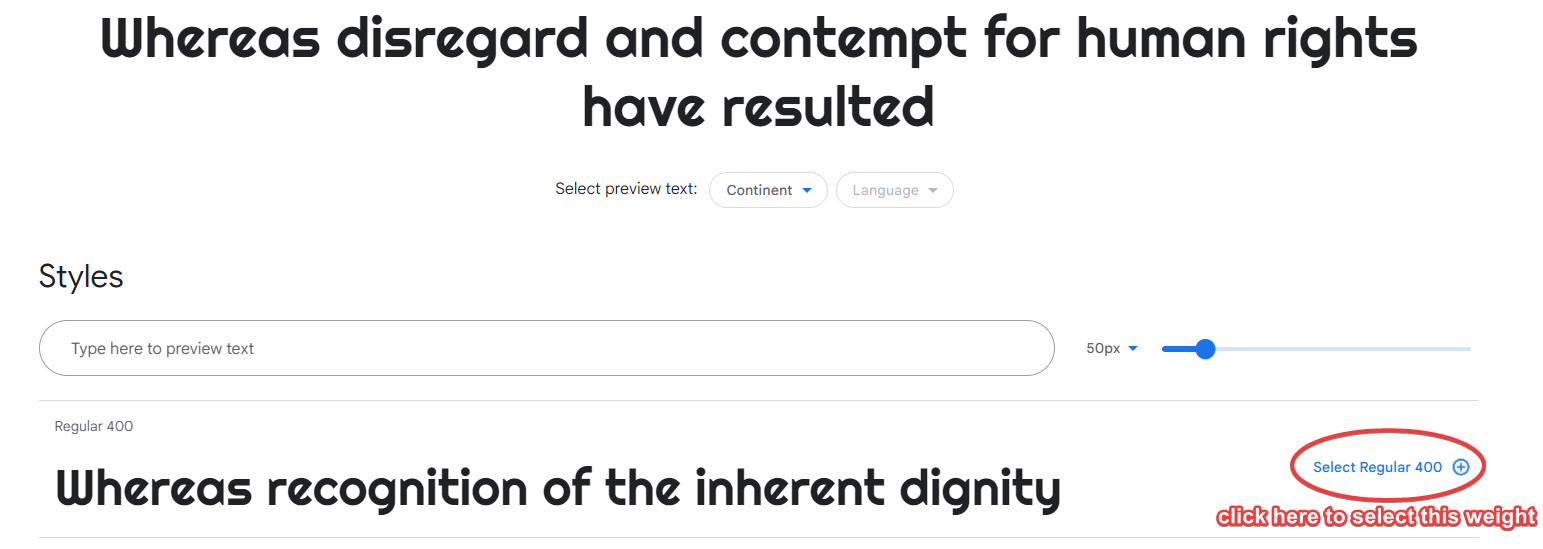 With the font we want selected, we can also return to the list of all fonts, find another we’d like to use, and select that as well. We’ll only use one font to simplify this example, but Google Fonts makes it easy to import our entire font pairing in one go.
3. Click the “View Selected Families” button
After we’ve selected all the font families we’d like to use in our project, select the button in the top right corner of the page. Clicking this button will open a pop-out that contains the code we need to import the fonts into our project.
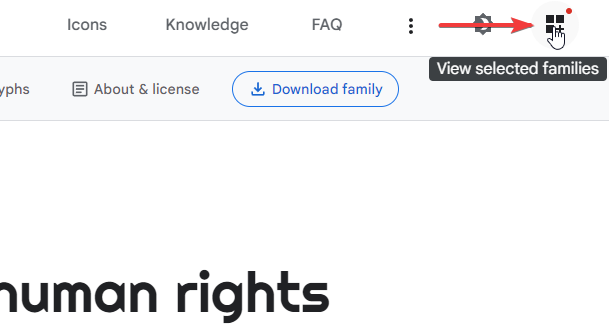
4. Copy the “link” code provided in the popout
While we can use the import code in our CSS instead, we’ll usually want to use the link code as it allows for a “preconnect” relationship meaning that the browser will connect to the Google Fonts CDN as soon as the page is accessed. Using the link element method in the head of your HTML page also has the bonus of providing an extra layer of search engine optimization for your page and adds compatibility for systems that people don’t often use. For these reasons, we’ll use the link elements to add the font to our page in this walkthrough.
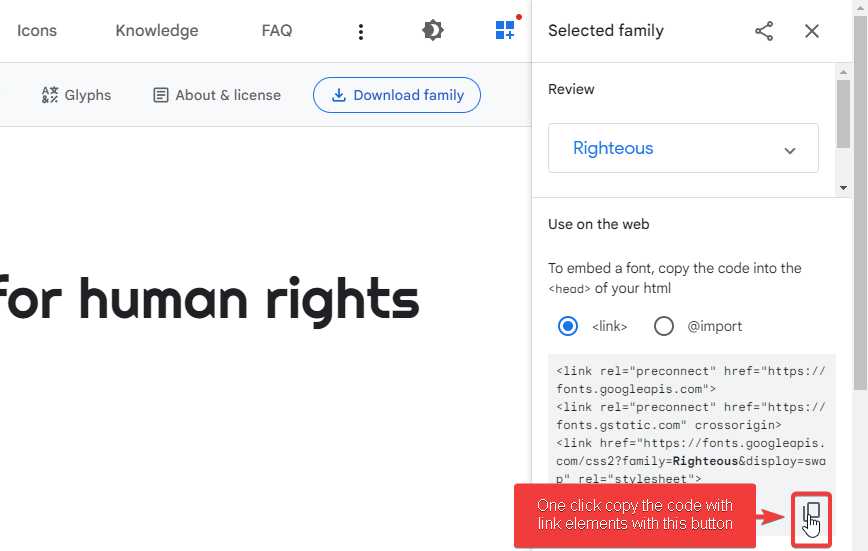
5. Paste the provided code in the head of your HTML page
This step is fairly self-explanatory. The only important thing is to ensure that you’re pasting the code inside the head section of your HTML, as shown in this screenshot.

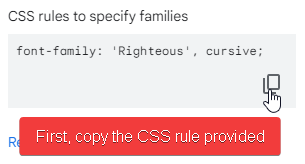
6. Use the provided CSS rules to have parts of your page use your font
Now that your page connects to the Google Fonts CDN when accessed, all that’s left is to use CSS to tell your page to use the fonts from that CDN. Google Fonts also provides these rules for us, so we don’t even need to write these rules ourselves!
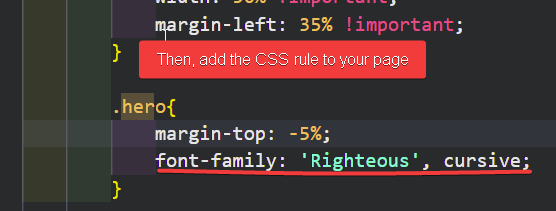
Et voilà! We’ve now added the font to our page, and upon loading it, we can see the font is used in the hero section as we specified in our CSS.

2. Using Font Files
If you’ve read Kieran’s article on why CDNs can be dangerous, you may be hoping there’s an alternative to using them to include web fonts in your project, and there is! Instead of using a CDN, you can have the font files directly on your site.
1. Download the font file
We’ll pick a different font for this method to keep things fun, funky, and fresh. This time we’ll use Tilt Prism, another font with lots of character, great for titles and larger text on your page. To download this font, we’ll need to click the “Download Family” button at the top of the page.

2. Create a webkit for your selected font
Because different browsers support different file formats (more on this later), we’ll need to turn our downloaded file into multiple formats to include on our site. To do so, we’ll upload the .ttf file from the zip we downloaded from Google Fonts to Font Squirrel’s Webfont Generator and download the generated kit for us to use.
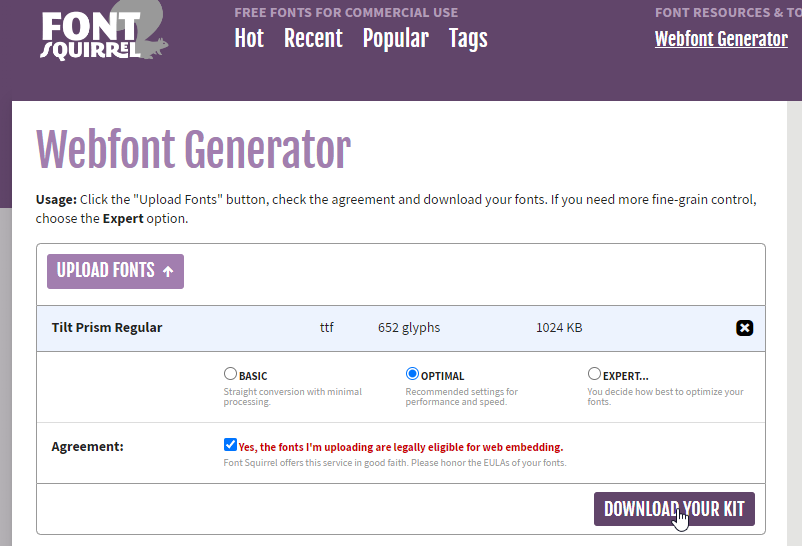
3. Create an @FontFace CSS rule
Now that we’ve downloaded the font kit, we’ll want to add it to a folder within the site we’re building. I like to keep fonts together with my images and other visual resources, but you can put them wherever you’d like. Then we’ll need to make @font-face rules to tell our page we’d like to use a custom font. In this rule, we’ll need to include the name of the font family and the source files from the kit we created. In this case, my kit contained a woff file and a woff2 file, so I’ll include both. You can use this same format as the code below to include any other font file types you’d like to support. Additional format extensions for different file types can be found on the MDN web docs page for font formats.
<style>
  @font-face{
    font-family: "tilt-prism";
    src: url(./fonts/tiltprism-regular-variablefont_xrotyrot-webfont.woff)format("woff"),
         url(./fonts/tiltprism-regular-variablefont_xrotyrot-webfont.woff2)format("woff2")
        }
</style>
4. Add your font using CSS rules
Lastly, we’ll need to include a CSS rule in our code as we did with the Google Font CDN. Like the last example, I’ve included it in our web page’s hero section, and as you can see, the page now loads with our font!
    .hero{
            margin-top: -5%;
            font-family: "tilt-prism";
          }

Pitfalls of Web Fonts
Issues, errors, things to consider, and how to avoid problems
While web fonts are a marvelous tool in your web development arsenal, they are not without problems. Here are some things to consider when picking out your fonts and method to add that font to your project.
The Font May Fail to Load
Even if you followed all the steps above, the font might not load on your site. When this occurs, your site will load with a default font instead, which is not ideal. Adobe provides a relatively thorough overview of why a web font may fail to load and troubleshooting options for each issue, including issues with font face rules in minified CSS, problems with browser preferences, and extensions blocking web fonts from being loaded. However, the most common reason fonts fail to load correctly is that the browser does not support the font file type that you are using.
Since we know that a common problem with web fonts is file type support between browsers, we can use what we know about different browsers to ensure the file types we have cover all our bases.
W3 Schools has created a great resource shown below that we can use to check which file types are supported by which versions of each browser.
 Since we can include more than one source within our @font-face rules, all we need to do to ensure each browser supports our web font is to have multiple file types within our rule. When the browser loads our web page, it will go through the list of provided source files and find a format it supports. The great thing about this solution is that the browser won’t even try to load the file types it does not support and will continue down the list until it finds one it does, which it will then load. This process minimizes the performance impact of including multiple file types on the performance of your page. For instance, if we want to make sure that the earliest version of each browser supports our web font, as well as get the performance benefits of a more recent file type in modern browser versions, we’d need to include an EOT, TTF, and WOF2 file for our font as shown in the example below. This method should minimize the instances of fonts failing to load.
<style>
  @font-face{
    font-family: "tilt-prism";
    src: url(./fonts/myfont.eot)format("embedded-opentype"),
         url(./fonts/myfont.woff2)format("woff2"),
         url(./fonts/myfont.ttf)format("truetype");
        }
</style>
FOUT and FOIT:
Another common issue that occurs is known as a “Flash of Unstyled Text” or FOUT, where there is a delay in the browser’s download of the font resulting in the temporary use of a system font before the specified font takes its place. This codepen by Micikato (shown below) does a great job of simulating what this looks like on a web page.

To get around this, we can add a “font-display” property of “block” to our @font-face rule. Doing so will block the content using this font from loading until the font is completely downloaded and ready to be used on your page. You can find an example of this in the code snippet below.
<style>
  @font-face{
    font-family: "tilt-prism";
    src: url(./fonts/myfont.eot)format("embedded-opentype");
    font-display: block;
        }
</style>
While this stops FOUT, it also creates a new problem of FOIT, or Flash of Invisible Text, where the content using your font does not show up at all for a second before it loads in with the proper font. Though some developers may prefer this to FOUT, it’s certainly not ideal. So what can we do to limit occurrences of FOUT and FOIT simultaneously? Remember earlier when we went over using Google Fonts CDN to add web fonts, and the link element had a preconnect relationship attribute? Using this preconnect attribute helps to reduce FOUT without inducing FOIT, as the browser will begin connecting to and collect the font from the CDN before the content even loads! In this way, by using the CDN method of including web fonts and the code provided by Google Fonts, we can reduce occurrences of FOUT.
<link rel="preconnect" href="https://fonts.googleapis.com">
<!--       ^^^^^^^^^^ using this preconnect relationship attribute reduces FOUT --->
If you’re still dead set on not using a CDN, you can also use a “preload” relationship attribute to load your font file instead. This method provides the same benefits as the preconnect relationship attribute in the CDN method but without needing a CDN since your font files are hosted with your site. Something to be aware of is that using this method blocks the site from rendering until your font is loaded, which can drastically increase your site’s load time if many files are being preloaded. That said, applying the preload relationship attribute to only a few files shouldn’t significantly impact performance.
<link rel="preload" href="./fonts/myfont.woff2">
<!--       ^^^^^^^ using this preload relationship attribute reduces FOUT when using font files--->
Encoding Support for Other Languages and Symbols
It’s important to remember that the first two w’s in www stand for “World Wide.” Once your site is published, any individual with an internet connection will be able to access it, and not all of them will speak the same language or even a language that uses the same alphabet as you. This should be considered by developers when selecting a font. Suppose we have content written in a different language and are trying to reach a global audience with our content. In that case, we must ensure that the alternative characters of a foreign language show up correctly on our page, and we also want to ensure those characters have the same or similar fonts as the rest of the content on our page.
To ensure that all different languages first show up properly on our page, we’ll need to specify that we want the webpage to use UTF-8 encoding. The gritty details of UTF-8 are beyond this article’s scope, but you should know that it translates ALL characters to a unique string that our browsers know how to handle if we tell them our page is using UTF-8. In doing so, we can ensure that the browser displays the correct character in the window for the user. SuperHi on YouTube has put out a great video demonstrating the functionality of UTF-8 encoding. To specify that you’d like your page to use UTF-8 encoding, you can add the following meta attribute to the head of your HTML page to ensure all characters display as intended.
<head>
  <meta charset="UTF-8"/>
</head>
Now that we have all characters, including those of other languages and emojis, displaying correctly on our page, we’ll want to ensure that these characters match the look and feel of our site. To do so, we’ll want to pick a font that supports the language we need that matches the font we’ve chosen for the rest of our content. While a simple google search for a font that supports whatever language you need will yield plenty of results, a great place to start looking is the Noto font series put out by Google Fonts. These fonts in select styles support most languages worldwide, even those now considered endangered and don’t have fonts elsewhere. There are even noto stylings for emojis and niche scripts like Egyptian heiroglyphics. Once you’ve found a font you like, you can add it to your site using one of the methods we covered previously in this post, and you’ll be ready to support content from other languages and still have it match the look and feel of the rest of your content.
Conclusion
What Have We Covered in This Article
In this blog post, we’ve taught you:
- What are web fonts, and how are they different from web safe fonts
- Design tips, tricks, and tools to select a font pairing
- How to add a web font to your site with a CDN like Google Fonts
- How to add a web font to your site using a font file
- How to avoid common web font errors like FOUT, FOIT, failure to load, and support for multiple languages
Using this information, you’re now ready to make your way into the vast world of web fonts and use them to take the design of your sites to the next level beyond what’s available with just web safe and system fonts.