If you’ve been learning or reading about web development, you’ve probably heard about Node.js. In this article series, we’ll help you get started using Node by building a homework-tracking application and providing you with all the information and tools you need to develop your own projects using Node. Before that, let’s talk about what Node is and how we can get started using it.
What is Node.js
At a basic level, websites and web apps have two parts, a front end that the user interacts with and sees, which is usually made up of the HTML, CSS, and Javascript that run on the users’ device, and a back end that processes data and hosts the logic needed to provide the user with the appropriate response. If you’ve taken the Scorch web development course, you’ll be familiar with using the Python and Flask as a back end for web projects. However, there are other options available. Node.js is a JavaScript runtime solution that instead allows you to develop a back end using JavaScript, which is typically used to make changes to the front end by interacting with the DOM. Node will enable us to extend the functionality of JavaScript from the front end to the back end by running Javascript code outside of the browser to write scalable web applications, making it an appealing option for developers to include in their stack.
Why should I use Node.js?
Node.JS is an attractive choice for backend development for several reasons:
NPM
NPM stands for the Node Package Manager and is widely known as the world’s largest software registry, currently containing over 1.3 million open-source packages you can use in your development. From web frameworks like Express.js to packages that make Javascript even easier to use, like lodash, NPM has a package for almost everything and comes baked in when you install Node. The ever-growing library of diverse packages makes NPM a great built-in feature that developers using Node can take full advantage of.
Consistency and Efficiency
One of my favorite things about Node is the fact that it’s a Javascript run time. This means it runs javascript code right on your machine. You can then combine node with different front-end frameworks like next.js and setup tons of different types of databases, including NoSQL databases like MongoDB (which use documents similar in structure to JSON to store data instead of tables), it’s now possible to write most of your application using only Javascript. This means that your applications can be written more consistently without switching to different languages in different parts. Additionally, since Javascript is an incredibly popular language, you can find help and answers to any questions you may come across during development with a simple Google search.
Speed
Node is built on Google’s Chrome V8 runtime, which executes Javascript code by first compiling it into machine code that is far more efficient and instead runs that. This means that not only can we use Node to run Javascript code outside of the browser but also that the code that we run with Node can be executed extremely quickly and, in many cases, can run even faster than our Python code can if we were to use a framework like Flask instead. This makes Node an excellent choice for developing real-time applications or for processing a lot of data quickly to provide users with a response.
When should I use node?
The speed and versatility of Node make it an extremely popular choice for building projects and services that require real-time data display. Not only that, but the scalability offered by Node makes it a good choice for anyone, no matter the project size. For instance, on top of the many hobbyists and start-ups using Node to build their products, large companies like Walmart, LinkedIn, Uber, and even Netflix also use Node to deliver their services.
In addition to creating websites and web apps, several other use cases for Node are not quite as obvious. One popular use for Node is creating discord bots for servers using the module discord.js. With this module, we can use Node to run the logic needed for the bot, including responding to user messages and bot commands. Another way that we can put Node to good use is through the package electron.js, with which we can create desktop applications using only HTML, CSS and JavaScript.
How will we learn about node?
This post is the first in a series about Node.js that will walk you through the syntax and structure of a Node project, get you started using NPM and some of the standard packages that will be useful to you as a Node developer, and introduce you to a node based stack that you can use to develop whole projects of your own. As with many things in programming, one of the best ways to learn is by doing so we’ll be learning how to use Node by creating an application together that, hopefully, we as students will be able to get some use out of: a homework/exam tracker that we’ll call “Due or Die.”
Due or Die will function by allowing users to create accounts under which they can submit a list of courses they are taking for the semester, a list of assignments/exams for each class, and a due date for each assignment. Our app will save this information to a database that we will set up. It will then have a dashboard that users can access after logging in, which will display upcoming due dates and an option to send out email reminders that an assignment due date is coming up. With our application, missed deadlines will be a thing of the past!
Where can I find the code for this project?
The code for Due or Die will be available on my GitHub in its own repository. The repository is called “due-or-die” and can be found here. Before each article is posted, I’ll create a new branch that contains all the code up to and including the latest code from that post. In this way, you’ll be able to see the application grow and expand over time, follow along with each article to build the application out yourself and check your work against mine if you run into any errors as you’re coding.
How to install node
Now that we’ve gone over what Node is and the application we’re building, we can get started with Node itself. The first thing that we’ll need to do is install Node so that we can begin using it to run our JavaScript code.
On Windows
Node.js has an install wizard that we can download to install Node on our Windows machine. The installer will also download and install NPM for us and add both to our system’s path so that we can call Node and NPM from the command line. The most recent version of the installer can be found here. Once your download has finished, just open the installer and follow the instructions in the wizard to complete the installation!

On Mac
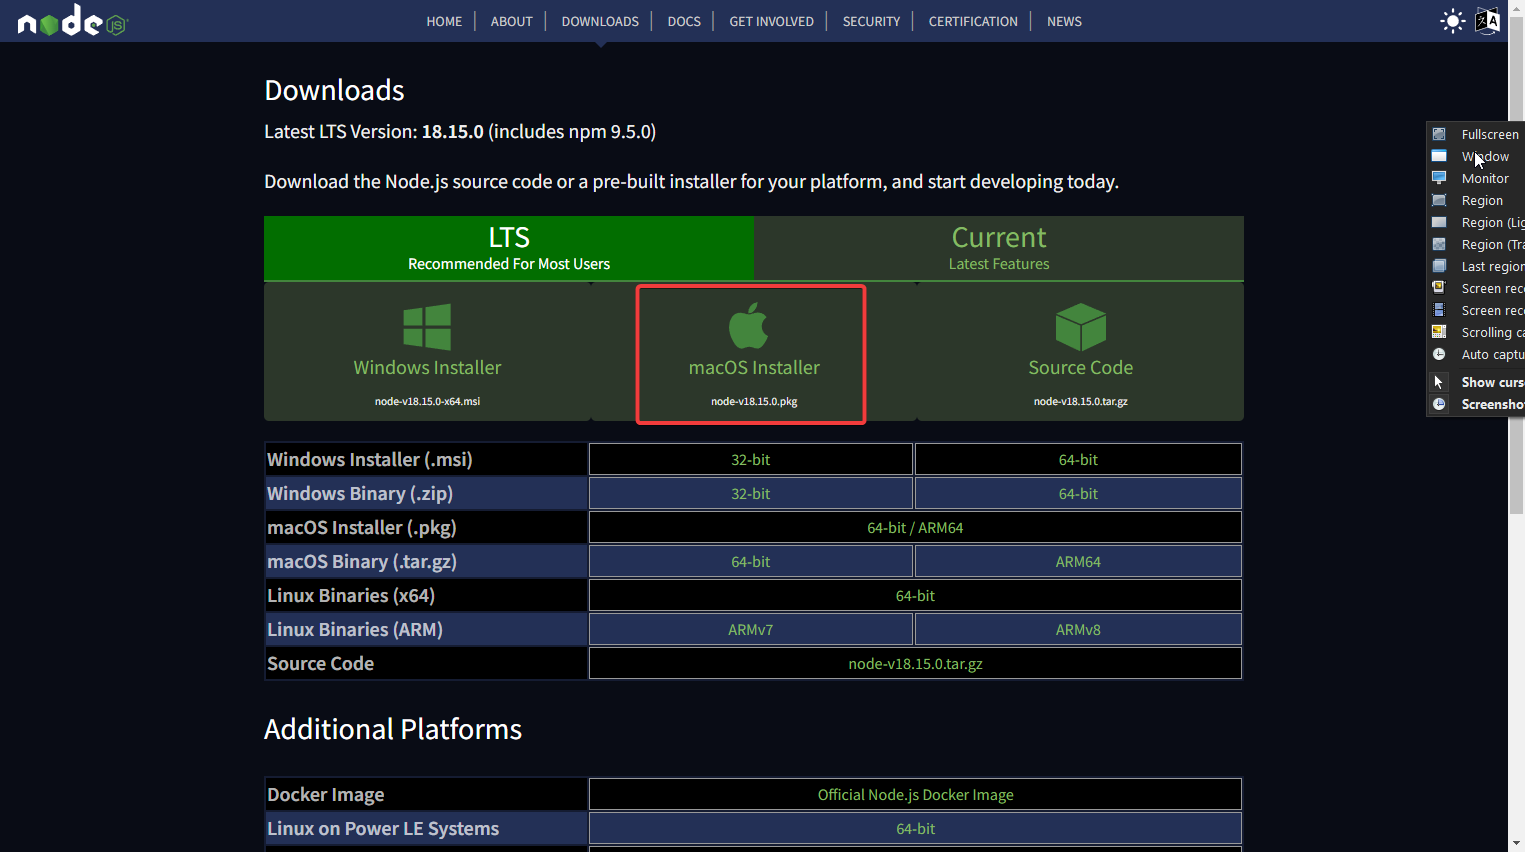
Node.js also has a macOS install wizard that you can use if you’re an Apple user. Simply navigate to the downloads page and click the macOS installer to download the .pkg file instead of the Windows installer. Once downloaded, you’ll just need to run the installer, and you’ll be all set.
On Linux
Node.js and NPM have been made available in the Ubuntu repository, making it possible to install each from the terminal in just a few commands. In my experience, this is the easiest way to install Node and NPM on a Linux machine and is the way we’ll be using in this guide. To do so, you’ll first need to open a terminal which you can do using the Ctrl + Alt + T keyboard shortcut. Once in your terminal, use the following command to install Node on your device:
sudo apt install node.js
Node will now be installed on your device, but you’ll need to do the same to install NPM since it will not be installed along with Node as it is using the macOS or Windows installers. To do so, you can use the following command:
sudo apt install npm
Testing the Install
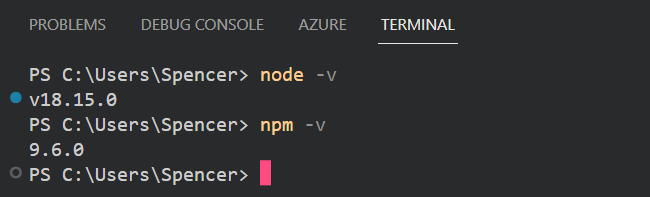
Now that we’ve installed Node, we’ll want to test that our installation worked properly and ensure that NPM has also been installed. To do so, we will check the version of Node and NPM that have been installed by opening up a terminal and running the command:
node -v
If our installation was successful, we should be met with the Node version installed on our machine. We should check the version of NPM that we have also installed to ensure that it has been installed successfully. To do so, run the command:
npm -v
My output for these commands returned a version number, so my installations of both Node and NPM were successful, and I’m now ready to begin using it to run JavaScript code!
Running our first file with node
Now that we’ve confirmed that Node is correctly installed and can be called, we’ll use it to run a JavaScript file. As an aside, now’s a good time to mention that while we’ll do our best to cover the JavaScript syntax used in the project as it comes up, it will be beneficial to have a basic understanding of JavaScript so that you can follow these articles more easily. If you need a refresher or are looking to learn JS for the first time, I highly recommend both freecodecamp.org’s free online boot camp for JavaScript, as well as the slides for the sessions of our web development course Scorch where session 2 and session 3 contain an overview of several fundamental concepts.
To get us started, we’ve written a file called hello_there.js containing a simple print statement (in JS, the syntax to print is console.log(“whatever you’d like to print”)) that will execute when the file is run. The code for this file can be found below, but it is also in the GitHub repository for this series mentioned earlier.
console.log("General Kenobi")
To use our newly installed javascript runtime to execute this file, we’ll first need to ensure that we are in the same folder that the file we just wrote is in. We’ve stored this in the file for the “due-or-die” repo, so we’ll need to cd into that folder. Once there, we can use the command below to execute any JavaScript file, where filename.js is the name of the JavaScript file you want to run. Something to note is that the filename can instead be replaced with the relative path of the file compared to where you currently are in the file directory, but since we made sure we were in the folder the file is in, we can just call the file name directly.
node <filename.js>
With this command, the code in the file will then execute, and we’ll be met with the printed line, as shown below

Conclusion
Congrats! With that, you’ve just used Node.js to run your first JavaScript file. From here, we’ll be able to work on building our application. Now that we have run a file in Node, I recommend writing some scripts in JS and running them with Node to get used to running different files so you’re ready to rumble when the next article drops. I’d also recommend refreshing yourself with the JS syntax if you’ve not had a chance to do so already because the code we write will become much more complex from this point on.
In the next post, we’ll expand on what we learned about here by talking about some basic project structures before diving into more detail about NPM, some different available packages, and how we can go about incorporating them into our project.
See Next post